


Did you know that many water heater issues stem from simple, overlooked factors? When your water heater breaks down, it can feel overwhelming, but addressing it doesn’t have to be complicated. There are seven practical solutions you can try to get it back in working order. Before you rush to call for help, consider these steps to troubleshoot the problem effectively. You might find the fix is easier than you think.
Check the Power Supply
Before diving into more complicated repairs, it’s essential to check the power supply to your water heater. Start by ensuring the unit is plugged in and that the outlet is functional. If you’re using a circuit breaker, make sure it hasn’t tripped. Flip the switch back on if necessary.
If power’s still an issue, inspect any visible wiring for signs of damage or wear. Frayed or burnt wires can lead to serious problems, so be cautious.
Next, consider the type of water heater you have. If it’s electric, a fuse might have blown, so check your fuse box.
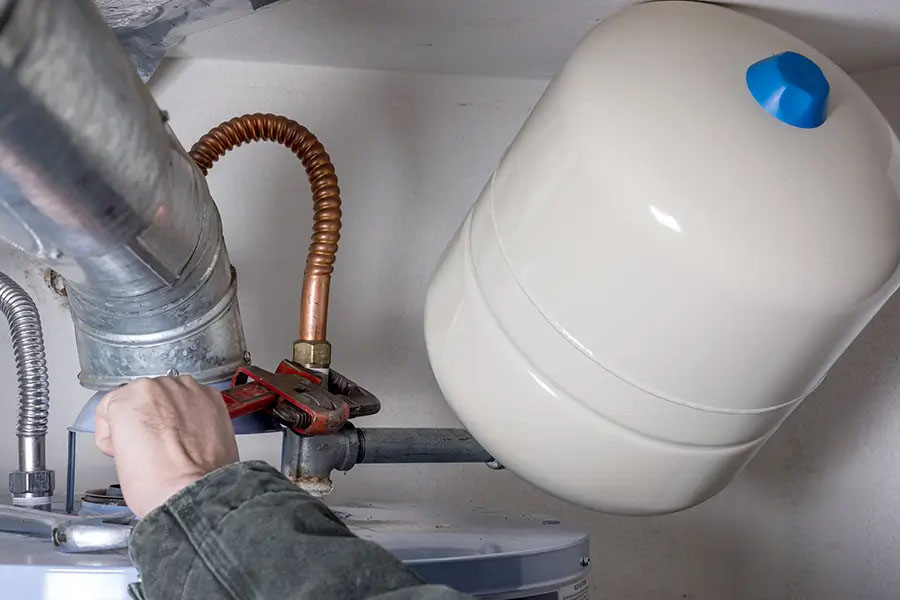
For gas models, verify that the gas supply is turned on and that the pilot light is lit. These simple checks can save you time and frustration before moving on to more intricate troubleshooting steps. Additionally, if you find that the water heater is still not functioning properly, you may want to consult a trusted plumbing contractor to ensure a thorough inspection and repair, with 24/7 emergency service available for urgent situations.
Inspect the Thermostat Settings
Now it’s time to inspect your water heater’s thermostat settings.
Start by checking the temperature setting to make certain it’s at an ideal level for your needs.
Next, you’ll want to test the thermostat’s functionality and adjust it for better efficiency if necessary. Regular maintenance can further enhance system efficiency and ensure consistent performance of your water heater.
Check Temperature Setting
How often do you check the temperature setting on your water heater’s thermostat?
It’s essential to verify it’s set correctly for both comfort and safety. The ideal temperature is typically around 120°F, which prevents scalding and saves energy. If it’s set too high, you risk burns and wasted energy.
Here are a few tips to keep in mind when checking the temperature setting:
- Use a thermometer: This helps you verify the actual water temperature.
- Adjust gradually: If you need to change the setting, do it in small increments to avoid sudden temperature changes.
- Regular checks: Make it a habit to check the setting every few months to confirm it hasn’t drifted.
Keeping an eye on this can prevent potential issues down the line!
Test Thermostat Functionality
Testing the thermostat functionality of your water heater is essential to confirm it operates efficiently and provides the right temperature.
Start by checking the thermostat settings to verify they’re set correctly. If the thermostat’s set temperature is lower than the desired output, it could explain why your water isn’t hot enough.
Next, listen for any clicking sounds when adjusting the settings, indicating it’s functioning properly. If there’s no response, the thermostat might need replacement.
Don’t forget to inspect the wiring for any visible damage or loose connections, as these can affect performance.
Adjust for Efficiency
Adjusting your thermostat settings can greatly improve your water heater’s efficiency, ensuring you get the hot water you need without wasting energy.
Start by checking the temperature setting; a range of 120°F is usually ideal.
Here are a few tips to enhance efficiency:
- Lower the temperature: Reducing it just a few degrees can save energy and prevent scalding.
- Insulate your tank: This helps maintain temperature and reduces heating cycles.
- Regularly inspect settings: Make adjustments based on seasonal needs to maintain comfort.
Flush the Tank to Remove Sediment
To guarantee your water heater functions efficiently, it’s essential to flush the tank regularly to remove sediment buildup. Over time, minerals from the water settle at the bottom of the tank, which can hinder performance and reduce lifespan.
To start, turn off the power supply or gas to your heater and close the cold water supply valve. Attach a garden hose to the drain valve at the bottom of the tank and run the other end to a nearby drain or outside.
Open the drain valve and let the water flow out until it runs clear, indicating that most of the sediment is gone. While the tank drains, you can briefly open the cold water supply valve to stir up any remaining sediment.
Once the tank is flushed, close the drain valve, remove the hose, and refill the tank before restoring power or gas. Regular flushing helps maintain efficiency and prolongs your heater’s life. Scheduling professional inspections can also catch small issues early before they turn into costly repairs. For added peace of mind, having access to 24/7 emergency service ensures you’re covered if unexpected problems occur.
Examine the Heating Elements
After flushing the tank to remove sediment, it’s time to check the heating elements. These components are essential for heating your water, so you want to verify they’re functioning properly.
Start by turning off the power to the water heater. Remove the access panels and inspect the elements visually. Look for signs of damage or wear.
Here’s what to focus on:
- Burnt or Blistered Elements: If you notice any visible damage, it’s a clear sign they need replacement.
- Continuity Test: Use a multimeter to check for continuity. If there’s no continuity, the element is faulty.
- Sediment Buildup: Excess sediment can insulate the elements, causing them to overheat.
If you find any issues, replacing the heating elements can restore your water heater’s functionality. Always make sure to turn off the power supply before attempting any replacement to avoid electrical hazards. Using manufacturer-approved parts helps maintain efficiency and extend the system’s lifespan. If the problem persists after replacement, contacting a professional plumber with 24/7 emergency service ensures your water heater gets prompt and reliable attention.
Look for Leaks and Corrosion
When fixing your water heater, inspect for visible leaks around the tank and pipes.
Next, check for any signs of corrosion that could indicate a bigger problem.
Finally, assess the overall condition of the tank to guarantee it’s still safe and functional.
Inspect for Visible Leaks
Inspecting for visible leaks is essential in maintaining your water heater’s efficiency and longevity.
Start by examining the unit and surrounding area for any signs of leaks. Even small leaks can lead to bigger problems if ignored.
Here are a few things to look for:
- Damp spots or puddles near the base of the heater
- Water stains on the walls or floor
- Rust or corrosion on the tank or pipes
If you spot any of these issues, it’s vital to address them promptly.
Ignoring visible leaks may not only waste water but also lead to costly repairs down the line.
Regular inspections can help you catch problems early, ensuring your water heater operates smoothly and efficiently.
Check for Corroded Pipes
Once you’ve checked for visible leaks, examining the pipes connected to your water heater for signs of corrosion is crucial.
Look for any rust or discoloration, which could indicate that the pipes are deteriorating. If you spot any corroded areas, it’s vital to address them quickly. Corrosion can weaken the pipes, leading to leaks and potentially costly water damage.
Use a flashlight to inspect hard-to-reach areas and verify you check both the inlet and outlet pipes. If you notice significant corrosion, consider replacing the affected pipes.
Don’t hesitate to call a professional if you’re unsure about the condition of your plumbing. Keeping your water heater’s pipes in good shape can save you time and money in the long run.
Assess Tank Condition
A thorough assessment of your water heater’s tank condition is essential for preventing future issues.
Start by looking for leaks and signs of corrosion, as these can lead to significant problems down the line.
Here are a few key points to evaluate during your inspection:
- Check for visible rust: Look along the seams and at the base of the tank.
- Inspect for puddles: Any water accumulation around the heater may indicate a leak.
- Feel for damp spots: Wet areas on the tank surface can signal internal issues.
Reset the Circuit Breaker
If your water heater isn’t functioning properly, it’s worth checking the circuit breaker before diving into more complex solutions. Sometimes, a tripped breaker might be the simplest fix.
Locate your electrical panel, usually found in a basement, garage, or utility room. Open the panel and look for the breaker labeled for your water heater. If it’s in the “off” position or appears tripped, flip it back to the “on” position.
After resetting, wait a few minutes and check if your water heater starts working again. Listen for sounds of heating or check the water temperature. If it’s still not heating, you might need to explore other issues.
Just remember, the circuit breaker is a quick and easy step to troubleshoot before considering more involved repairs. By taking this simple action, you could save yourself time and hassle.
Call a Professional HVAC Technician
When your water heater still isn’t working after checking the circuit breaker, it’s time to call a professional HVAC technician.
Attempting further repairs on your own could lead to more issues or even safety hazards. A certified technician has the expertise to diagnose and fix problems efficiently.
Here are some benefits of contacting a professional:
- Expertise: They understand the intricacies of different water heater models and can troubleshoot effectively.
- Safety: Professionals are trained to handle electrical and plumbing systems safely, reducing the risk of accidents.
- Warranty Protection: Many repairs are covered under warranty, ensuring you won’t incur unexpected costs.
Conclusion
When your water heater is on the fritz, you don’t have to navigate the storm alone. By checking the power supply and adjusting the thermostat, you can steer your way back to hot showers. Flushing the tank and examining the elements keep the waters calm, while watching for leaks shields against future floods. If the tide doesn’t turn, don’t hesitate to call in a pro. With these steps, you’ll have your hot water flowing like a gentle stream once more.